California Fly Casting for Beginners
Trying to learn fly casting can feel like you're trying to learn a secret handshake that everyone else already knows. It looks so graceful and effortless when an experienced angler does it, but when you pick up a rod for the first time, it often feels awkward, tangled, and frankly, a bit frustrating. This guide is all about cutting through that complexity and giving you a clear, actionable path to mastering the fundamental California fly casting techniques, specifically designed for absolute beginners ready to hit the beautiful waters of the Golden State.
Demystifying the Basics of Fly Casting
Before you even think about putting a fly on the water, it’s essential to understand the tools of the trade and the core principles that make a fly cast work. Unlike spin fishing where the weight of the lure pulls the line, in fly fishing, it's the weight of the line itself that carries the virtually weightless fly. This fundamental difference is key to understanding everything else.
Understanding Your Fly Rod and Reel
Your fly rod and reel are a symbiotic pair, each playing a crucial role, though perhaps not in the way you might expect if you’re coming from conventional fishing. The fly rod is your primary casting tool. Rods are categorized by "weight," which corresponds to the weight of the fly line they are designed to cast. For most beginners in California, a 5-weight or 6-weight rod is a fantastic all-around choice. This versatility means you can target anything from trout in a High Sierra alpine lake to smaller bass in a local pond. For instance, a lighter 3-weight or 4-weight might be perfect for delicate presentations on a small trout stream like the upper Kern River, while an 8-weight or 9-weight would be better suited for battling larger species like California salmon or striped bass, especially in the Delta.
The fly reel, on the other hand, isn't primarily for casting distance, as you might find in spinning or baitcasting. Its main job is to store your fly line and backing (a thin, strong line attached to the fly line for when a fish makes a long run). Critically, a good fly reel provides a smooth drag system to help you fight fish without breaking your leader or snapping your rod. Brands like Orvis, Redington, and Sage offer excellent beginner-friendly combos that pair a rod, reel, and line perfectly, taking the guesswork out of matching components for novices. You can often find great entry-level sets on Amazon that will get you started without breaking the bank.
The Importance of Fly Line and Leader
The fly line is the engine of your cast, literally. It's much thicker and heavier than standard fishing line, and its weight is what you're actually "casting." Most beginners start with a weight-forward (WF) floating fly line. "Weight-forward" means the front section of the line is heavier, which helps punch through the air and makes casting easier, especially for beginners. "Floating" means it stays on the surface, which is ideal for presenting dry flies or nymphs. There are also sinking lines for getting flies deep, but that's a technique for later.
Attached to your fly line is the leader, which is typically a clear, tapered monofilament or fluorocarbon line. It’s designed to be nearly invisible to the fish and to transfer the casting energy smoothly from the heavy fly line to the delicate fly. A standard leader usually tapers from a thick "butt" section (which connects to the fly line) down to a very fine "tippet" section, where you tie on your fly. The leader helps turn over your fly gently, preventing it from splashing down clumsily. Understanding leader length and tippet size is crucial, especially when you start getting into the nuances of presentation for wary trout in clear water.
The Fundamental Casting Motion
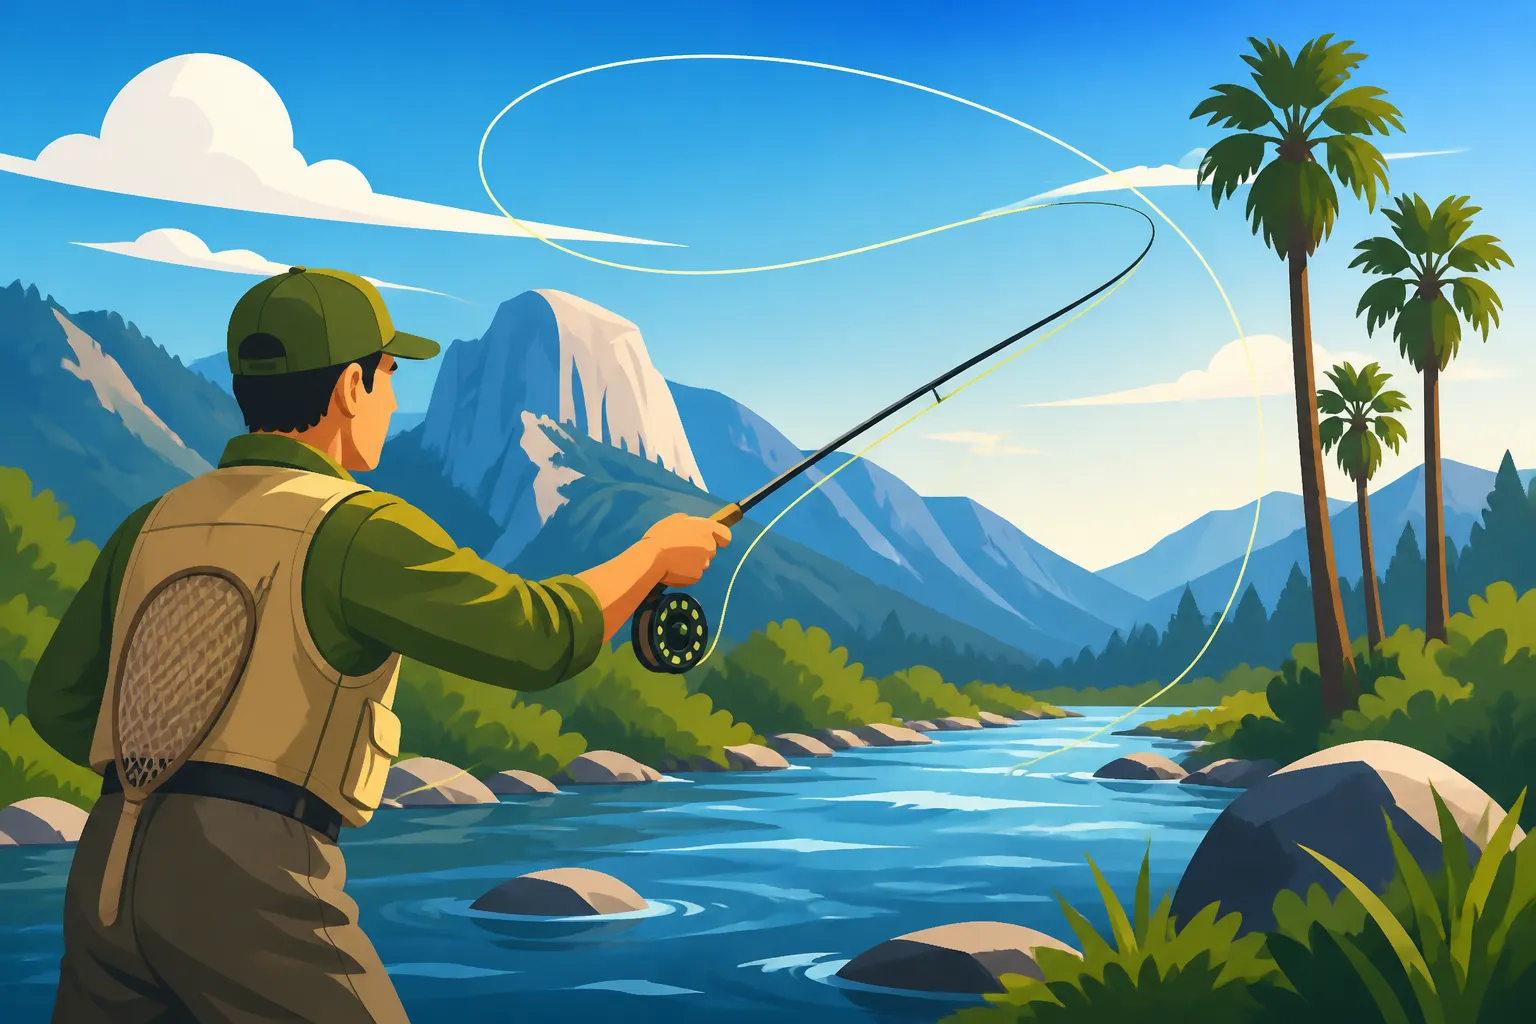
At its heart, fly casting is about making the rod bend and unbend, using the line's weight to load the rod. Think of it like cracking a whip, but in a controlled, rhythmic manner. The key isn't brute force; it's about smooth acceleration and abrupt stops. The rod tip needs to travel in a relatively straight line during the cast, creating a tight loop of line that unrolls efficiently.
Most casting instruction refers to the "10 o'clock to 2 o'clock" principle, envisioning your rod tip moving within this small arc. The rod tip accelerates, stops, and then waits for the line to extend. This happens both on your back cast (behind you) and your forward cast (in front of you). It’s an art form of momentum transfer and timing, which we'll break down further in the next section.
Breaking Down the Overhead Cast Step-by-Step
The overhead cast is the most fundamental and universally used fly cast. Mastering it is your first big step to becoming a confident fly angler. Don't worry if it doesn't look perfect right away; everyone starts somewhere!
The Pick-Up and Back Cast
Let’s assume you have a short length of fly line (about 10-15 feet) lying straight out in front of you on the water or grass. This is your starting position.
- Preparation (The Pick-Up): Point your rod tip low, towards the line in front of you. With your dominant hand, grip the rod handle firmly but not too tightly, thumb generally on top. Your non-dominant hand might lightly hold the fly line coming off the reel, ready to "strip" or pull line. Gently lift the rod tip, just enough to take out any slack in the line.
- Smooth Acceleration Backward: Now, the magic begins. Smoothly and gradually accelerate the rod backward, initiating the "back cast." The key here is smooth acceleration. Don't jerk it. Your wrist and forearm do most of the work, but involve your whole arm if you need more power for longer casts.
- The Abrupt Stop (1 o'clock): As your rod reaches roughly the 1 o'clock or 2 o'clock position (just past vertical, but not too far back that you hit the ground or water behind you), stop it abruptly. Imagine you’re trying to stop a heavy pendulum at its highest point. This sudden stop sends the energy through the rod, loading it and propelling the line backward.
- The Pause and "Feel": This is where patience comes in. After the stop, pause. Resist the urge to immediately cast forward. During this pause, you should feel the line unrolling behind you, gently pulling on the rod. If you rush, your line will collapse in a tangled mess. This "feel" is what experienced anglers rely on. You’re waiting for the line to fully extend behind you, which might take a second or two, depending on how much line is out.
The Forward Cast and Presentation
Once your back cast has fully unrolled and you've felt that gentle tug, it's time for the forward cast.
- Initiating the Forward Stroke: Begin the forward cast by smoothly accelerating the rod forward, bringing it from the 1 o'clock position down towards the 10 o'clock position in front of you. Again, it’s about smooth acceleration, not a jerky motion. Keep your casting arm relatively close to your body, avoiding wild, sweeping motions.
- The Abrupt Stop (10 o'clock): Just like the back cast, stop the rod abruptly when it reaches the 10 o'clock position (roughly parallel to the water/ground). This sharp stop is crucial. It unloads the rod, shooting the line forward in a tight, efficient loop.
- The Line Unrolls: Watch the line as it unrolls in front of you. A good cast will produce a tight, aerodynamic loop that carries the fly directly to your target with minimal splash. As the line approaches your target, you can gently lower your rod tip, guiding the line to lay out straight and softly. This is your "presentation."
- Stripping Line (Optional for Distance): For longer casts, as the line starts to unroll on your forward cast, you can gently pull or "strip" extra line from your reel with your non-dominant hand. This adds momentum and distance, often called "double hauling," but it's an advanced technique. For now, focus on getting the basic cast down.
Timing and Rhythm: The Key to a Smooth Cast
Timing is arguably the single most important aspect of fly casting. Think of it like a dance; each step needs to happen at the right moment. The common beginner mistake is rushing the pause between the back cast and the forward cast. You must wait for the line to unroll fully behind you.
This is where the concept of "false casting" comes in handy. A false cast is a practice cast where you don't actually let the fly hit the water. You perform a series of back casts and forward casts, keeping the line moving in the air. This helps you develop a feel for the weight of the line, perfect your timing, and extend more line. You'll often see anglers making several false casts before making their final, deliberate presentation. It’s their way of feeling the rhythm and getting the desired amount of line out. Many beginners find it helpful to say "back… and… forward!" in their head, emphasizing the pause between "and." The rhythm might change slightly based on the amount of line you have out and the type of fly line you're using, but the principle of acceleration-stop-pause remains constant.
Common Fly Casting Mistakes and How to Fix Them
Every fly angler has gone through the awkward phase of learning, and trust me, we've all made these mistakes! Recognizing them is the first step to correcting them and improving your cast.
The "Tailing Loop" and "Wind Knot" Woes
These two issues are practically rites of passage for new fly casters, and they often go hand-in-hand.
-
The Tailing Loop: This is when your line doesn't unroll smoothly in a nice, tight loop, but instead collapses on itself, often resulting in a knot near the fly or leader. It looks like the fly is trying to pass the heavier part of the line. The primary cause of a tailing loop is applying too much power too early in the stroke, or not stopping the rod abruptly enough. It's like trying to accelerate a car too fast in a low gear—it bogs down.
- The Fix: Focus on a smoother, more gradual acceleration throughout the casting stroke. Instead of trying to "throw" the line, think about pushing the rod tip through the casting arc. Ensure your rod tip travels in a straighter path; wobbling the rod tip causes an open loop, but a sudden dip or "hump" in the rod's path often leads to a tail. Practice stopping your rod abruptly and cleanly at the end of both the back and forward casts.
-
Wind Knots: These are those frustrating, tiny, tightly cinched knots that appear mysteriously in your leader or tippet, seemingly out of nowhere. While wind can certainly contribute, the main culprits are usually tailing loops or slack line during the cast. A tailing loop, as described above, creates a chaotic interaction where the fly line and leader cross over themselves. Slack in the line allows the lighter leader to wrap around itself.
- The Fix: By correcting your tailing loops, you'll naturally reduce wind knots. Additionally, always try to keep your line taut. Don't let too much slack develop between your rod tip and the fly during any part of the cast or retrieve. When you’re practicing, watch how your line unrolls. A tight, unrolling loop is your best defense against these infuriating knots. Sometimes, just slowing down and being more deliberate with your movements can make a huge difference.
Overpowering the Cast and Improper Stop Points
Many beginners instinctively think that more power equals a better, longer cast. In fly casting, this is often the opposite of what you need.
-
Overpowering the Cast: Applying too much muscle, especially with a short amount of line out, makes the rod unable to load properly. Instead of gracefully bending and releasing energy, it just stiffens, and the line crashes or makes a wide, inefficient loop. This can also lead to a tailing loop because you're forcing the rod to move too fast for the line's weight.
- The Fix: Ease up! Focus on smoothness and timing rather than brute force. Let the rod do the work. Imagine you're painting a straight line with the tip of your rod. Start with shorter casts (10-20 feet) and gradually extend your line as your technique improves. You’ll be surprised how little effort is actually required once your timing is on point. Think of the rod as an extension of your arm, not a blunt instrument.
-
Improper Stop Points: Where you stop your rod on both the back cast and forward cast dictates the shape of your loop and how the line unrolls. Stopping too low on the back cast (e.g., hitting the water or ground behind you) causes the line to crash behind you. Stopping too high on the forward cast (pointing the rod skyward) sends the line up, creating a wide, open loop that quickly loses energy and accuracy.
- The Fix: Reinforce the "10 o'clock to 2 o'clock" rule. On the back cast, aim to stop the rod high, around the 1 or 2 o'clock position. This allows the line to unroll high behind you. On the forward cast, stop the rod at around the 10 o'clock position. This drives the line forward and slightly downward, promoting a tight loop and good presentation. A good visual cue is to think about stopping your hand as if you're shaking hands with someone across from you.
Lack of Practice and Patience
This isn't a technical mistake, but it's perhaps the biggest hurdle for new fly casters. Fly casting requires muscle memory and a feel that only comes with repetition.
- The Challenge: Many beginners get frustrated quickly when their casts don't look like those effortless demonstrations. They might give up too soon or not dedicate enough time to consistent practice. Remember, even seasoned pros practice their casting.
- The Fix: Be patient with yourself. This is a skill, and like any skill, it takes time and practice to develop. Start with short, focused practice sessions. Don't try to learn everything at once. Focus on one aspect, like the stop, until it feels natural. Break down your learning into small, achievable goals. Consistent, mindful practice for 15-20 minutes a few times a week is far more effective than one marathon session once a month. Think of it as a journey, not a race.
| Common Fly Casting Problem | Symptom | Primary Cause | Quick Fix |
|---|---|---|---|
| Tailing Loop | Line collapses on itself, often resulting in knots near the fly (wind knots). Fly tries to pass main line. | Too much power too early; not stopping rod abruptly enough; "hump" in rod tip path. | Smooth acceleration, abrupt stops. Ensure rod tip travels in a straight line. Focus on pushing, not throwing. |
| Wind Knot | Tiny, tight knots appear in leader or tippet. | Tailing loops; excessive slack in the line. | Correct tailing loops. Keep line taut during all phases of the cast. Slow down movements. |
| Slack Line | Line doesn't load rod effectively; fly often lands in a pile; poor presentation. | Not taking out slack before casting; inadequate line control. | Always ensure a straight line from rod tip to fly before initiating a cast. Use your non-dominant hand to manage slack line. |
| Crashing Line (Back) | Line hits the water or ground behind you during the back cast. | Stopping the rod too low on the back cast. | Stop the rod high on the back cast (1-2 o'clock position). Aim for the line to unroll high behind you. |
| Crashing Line (Forward) | Line hits the water too hard in front of you; wide, open loops. | Stopping the rod too high on the forward cast (pointing skyward); overpowering. | Stop the rod at the 10 o'clock position. Focus on a tight loop that drives forward. Let the line extend naturally. |
| Lack of Distance | Casts are consistently short, despite effort. | Poor timing (rushing the pause); improper loading of the rod; inefficient loops; overpowering. | Focus on the pause between casts. Let the line fully unroll. Smooth acceleration and abrupt stops are crucial. Practice adding more line gradually. |
| Inaccurate Casts | Fly lands far from the intended target. | Inconsistent stop points; rod tip not traveling in a straight line; looking at the fly instead of the target. | Focus on consistent stop points. Point the rod tip at your target on the forward stop. Look at where you want the fly to land. |
| Fatigue | Arm and shoulder get tired quickly. | Using too much arm/shoulder; gripping rod too tightly; overpowering. | Relax your grip. Let your wrist and forearm do most of the work. Focus on efficiency over power. Take breaks. |
Practice Makes Perfect: Drills and Resources for New Anglers
Consistency is the real secret ingredient when it comes to fly casting. You don't need a massive river or even a lake to get started. Dedicated practice sessions, even in your backyard, will build the muscle memory you need.
Backyard Practice: Dry Land Drills
You don't need water to practice the core mechanics of fly casting. In fact, many instructors recommend starting on grass.
- The "Line on the Lawn" Drill: Lay about 20-30 feet of fly line straight out on your lawn. Now, without trying to pick it up, simply make back casts and forward casts, letting the line slide on the grass. This takes the pressure off "presenting" to fish and allows you to focus purely on the rod's movement, the acceleration, and the stops. You’ll be able to see the loop forming (or collapsing!) easily.
- Target Practice: Place a small target on the grass, like a Frisbee or a hula hoop, about 20-30 feet away. Practice casting your fly (without a hook, of course, or even just a piece of yarn tied to the tippet) directly onto the target. This helps you refine your aim and develop precision. You’ll quickly learn how small adjustments in your stop point affect where the line lands.
- The "Blindfolded Cast" (Advanced Drill): Once you're comfortable with the basic motions, try casting with your eyes closed or blindfolded. This forces you to rely solely on the feel of the rod loading and unloading, and the subtle tug of the line unrolling. It’s an excellent way to truly develop that intuitive timing. This also helps when you're fishing in real conditions, where you can't always see your line clearly.
Remember, even on dry land, your aim is to create those tight, efficient loops. If your line is making wide, sloppy loops or crashing into a pile, it's a sign to slow down and revisit the basics. Practice these drills in short bursts, say 15-20 minutes, a few times a week. Consistency will pay off far more than one long, exhausting session.
Moving to Water: Getting a Feel for the Real Thing
Once you're comfortable with your dry land mechanics, it's time to find some open water. Choose a location without too many obstacles or other anglers, perhaps a local pond or a quiet section of a river like the American River.
- Start Without a Hook: Seriously, don't put a hook on your line for your first few water sessions. This prevents frustrating snags in weeds or accidental self-piercings, allowing you to focus purely on your casting. Tie a small piece of brightly colored yarn to your tippet so you can easily see where your "fly" is landing.
- Observe Your Line: On the water, you can see how your line behaves in three dimensions. Watch how the loop unrolls, how much energy it carries, and how it lands. Is it splashing down too hard? Is it piling up? These visual cues are invaluable for refining your technique. Pay attention to how the wind affects your cast and how you might need to adjust your stop points or casting angle.
- The Roll Cast: This is a crucial cast for when you have no room for a back cast (e.g., steep banks, dense trees). The roll cast is a simple, efficient way to pick up line and shoot it forward. With line lying on the water in front of you, lift your rod tip high and slightly back, letting the line hang loosely from your tip, forming a "D" shape. Then, with a forward stroke, push the line off the water. This is an indispensable technique for fishing many brush-lined California rivers.
- Practice Mending: Once your fly is on the water, you'll often need to "mend" your line to control the drift of your fly. This involves flipping an upstream or downstream curve into your line to counteract currents. It's an extension of your casting arm's control and essential for natural presentations. This skill becomes paramount when fishing for trout in moving water.
When to Consider a Professional Instructor or Clinic
While self-teaching is certainly possible, there's no substitute for personalized feedback.
- One-on-One Instruction: A certified fly casting instructor can quickly identify and correct subtle flaws in your technique that you might never notice on your own. They can see if you're collapsing your wrist, stopping too late, or overpowering the rod. A single hour with an instructor can often save you weeks of frustrating self-correction. Many reputable fly shops across California offer lessons, from places like The Fly Shop in Redding to local guides in the Eastern Sierra.
- Group Clinics and Workshops: These are great for learning in a supportive environment and can be more budget-friendly than private lessons. You’ll often pick up tips from other beginners and get different perspectives from instructors. Check with local fly fishing clubs, tackle shops, or even outdoor recreation programs offered by organizations like the California Department of Fish and Wildlife (CDFW) for opportunities.
- Online Resources and Videos: While not a replacement for in-person instruction, there are countless high-quality online videos that demonstrate proper casting mechanics. Watching these slowly and repeatedly can help visualize the correct movements. Just be sure to cross-reference with multiple sources to ensure you're getting sound advice. Websites like Casting for Recovery also provide great resources for women getting into the sport.
Remember, the goal isn't just to cast far, it's to cast effectively and enjoy the process. Good luck, and tight lines out on the water! You'll be ready to explore many of California's fantastic fisheries, from chasing trout in the Trinity River Fishing Guide to finding bass in Clear Lake Fishing Guide, or even fly fishing for California Steelhead Fishing Guide in the future. Don't forget to check out the California Fishing License Guide and understand the California Freshwater Fishing Regulations before you go!
Disclaimer
Please be aware that fishing regulations, seasons, and licensing requirements in California can change frequently. Always consult the latest official California Department of Fish and Wildlife (CDFW) regulations booklet or their website before heading out to fish. This guide is for informational purposes only and should not replace official guidelines.